
Why great real estate photos matter
High‑quality listing photos — especially when leveraging real estate photography tips — help listings attract more interest, drive showings, and often result in quicker sales and better offers. With HomeViewPhotos, your brand stands out and your clients see your expertise in every image.
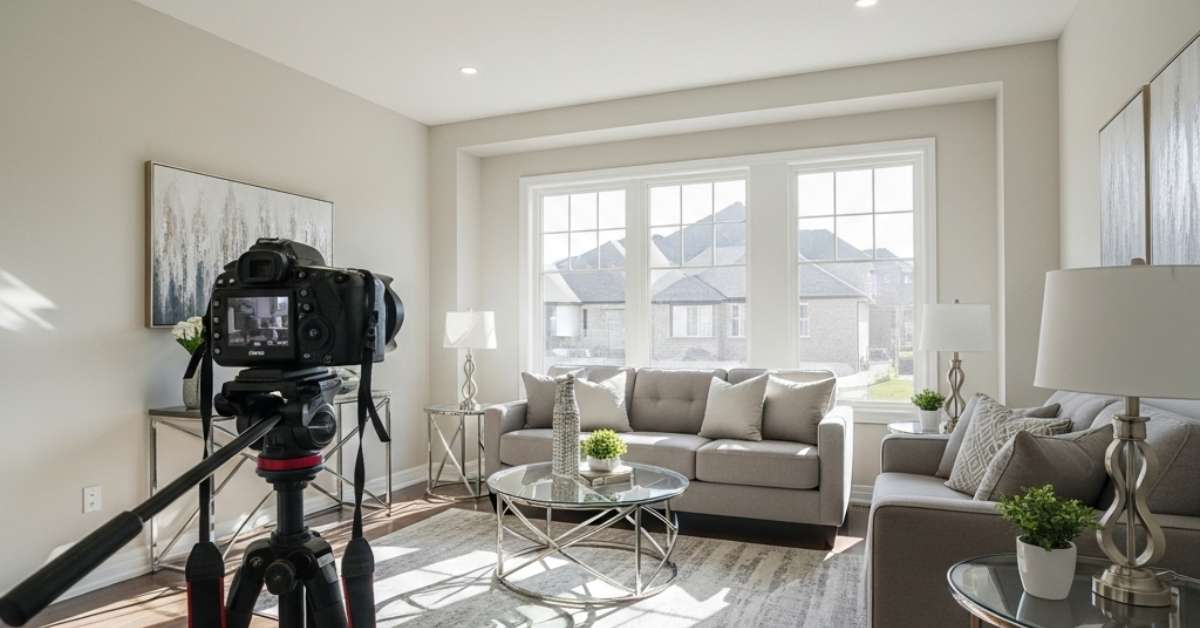
Pro Real Estate Photography Tips strategies for stunning listing photos
- Declutter for a clear canvas
Remove personal items, clear countertops, and tidy spaces before shooting. A minimal, staged environment ensures focus stays on the home itself—a fundamental rule in real estate photography tips. - Maximize natural light
Open curtains and blinds. Shoot during the “golden hours” (1 hour after sunrise or before sunset) for soft, warm lighting. Avoid mixed indoor lighting to prevent unnatural color casts. - Shoot at eye-level (≈5 ft)
Keep vertical lines straight and avoid distorted perspectives by shooting at natural height. It eliminates the “funhouse lens” effect and preserves architectural integrity. - Use a shot list
Plan ahead with a list: exterior angles, kitchen, living areas, bedrooms, baths, outdoor features. It ensures no important space is missed and keeps shoots efficient. - Style with staging
Use neutral décor—fresh flowers, neat linens, simple accessories. Each image should allow buyers to envision themselves living there, not distract with personal items. - Use the rule of thirds
Align key features (fireplaces, windows, entryways) along gridlines or intersection points. It enhances visual balance and viewer focus. - Correct white balance
Avoid blue or yellow casts. If needed, shoot RAW and adjust white balance in post so whites look natural and inviting. - Capture floors more than ceilings
Including a generous part of floors (and less ceiling) makes rooms appear larger—an often overlooked yet powerful photography tip. - Bracket & use HDR
Shoot 3 bracketed exposures (under, correct, over), then blend in post using Lightroom or Aurora HDR. This retains detail both indoors and window views - Edit with care
Don’t over-saturate or overindulge HDR—aim for realism. Use software like Lightroom or Photoshop to fix exposure, straighten lines, enhance clarity, and remove small distractions like wires .
Frequently Asked Questions (FAQ)
Real Estate Photography with HomeViewPhotos
1. Why should I choose HomeViewPhotos over DIY photography?
While DIY can work for basic listings, HomeViewPhotos offers professional-grade equipment, post-processing, and staging expertise that ensures your property is showcased at its best. This often results in faster sales and higher offers.
2. Can I still book HomeViewPhotos if I’ve already taken some photos myself?
Absolutely! We can enhance your existing images or do a full shoot to match professional standards. You can also book our editing-only service if you've shot your photos but need a polished finish.
3. What’s included in a typical HomeViewPhotos package?
Our standard package includes interior & exterior photography, post-processing (color correction, lens adjustment, object removal), and delivery in both web and high-resolution formats. Add-ons include twilight shots, virtual staging, and drone photography.
4. How long does a typical real estate photo shoot take?
A standard home (2–4 BHK) takes around 60–90 minutes to shoot. Larger properties or shoots with add-ons like drone footage or twilight sessions may take longer.
5. What equipment do HomeViewPhotos photographers use?
We use professional DSLR and mirrorless cameras, wide-angle lenses, external lighting, gimbals, tripods, and drones (where applicable) to ensure every angle is covered beautifully.
5. What equipment do HomeViewPhotos photographers use?
We use professional DSLR and mirrorless cameras, wide-angle lenses, external lighting, gimbals, tripods, and drones (where applicable) to ensure every angle is covered beautifully.
6. Where is HomeViewPhotos based? Do you cover all locations?
We are based in LA, California, and offer services across nearby cities and towns. For specific area coverage, please check our service locations page or contact us.
7. How can I book a shoot with HomeViewPhotos?
Visit www.homeviewphotos.com, click on "Book a Shoot", choose your package, and pick your preferred date/time. You can also call or WhatsApp us directly for custom quotes.
Decluttering before a shoot is one of the best tips—sometimes it’s easy to overlook how much unnecessary stuff can distract from the home’s true potential. A clean, tidy space really speaks for itself.