
When you’re selling your home, first impressions matter more than ever. With 97% of buyers starting online, your real estate photoshoot is the make-or-break moment to grab attention and sell faster. Whether you’re hiring a professional or using a service like HomeviewPhotos, preparing for a real estate photoshoot is essential.
High-quality photography can highlight your home’s best features, create an emotional connection, and ultimately help you sell faster and at a better price. But before the photographer arrives, you need to make sure your home is looking its best. This guide explains how to properly prepare your home for a real estate photoshoot, with actionable steps that will increase your home’s visual appeal.
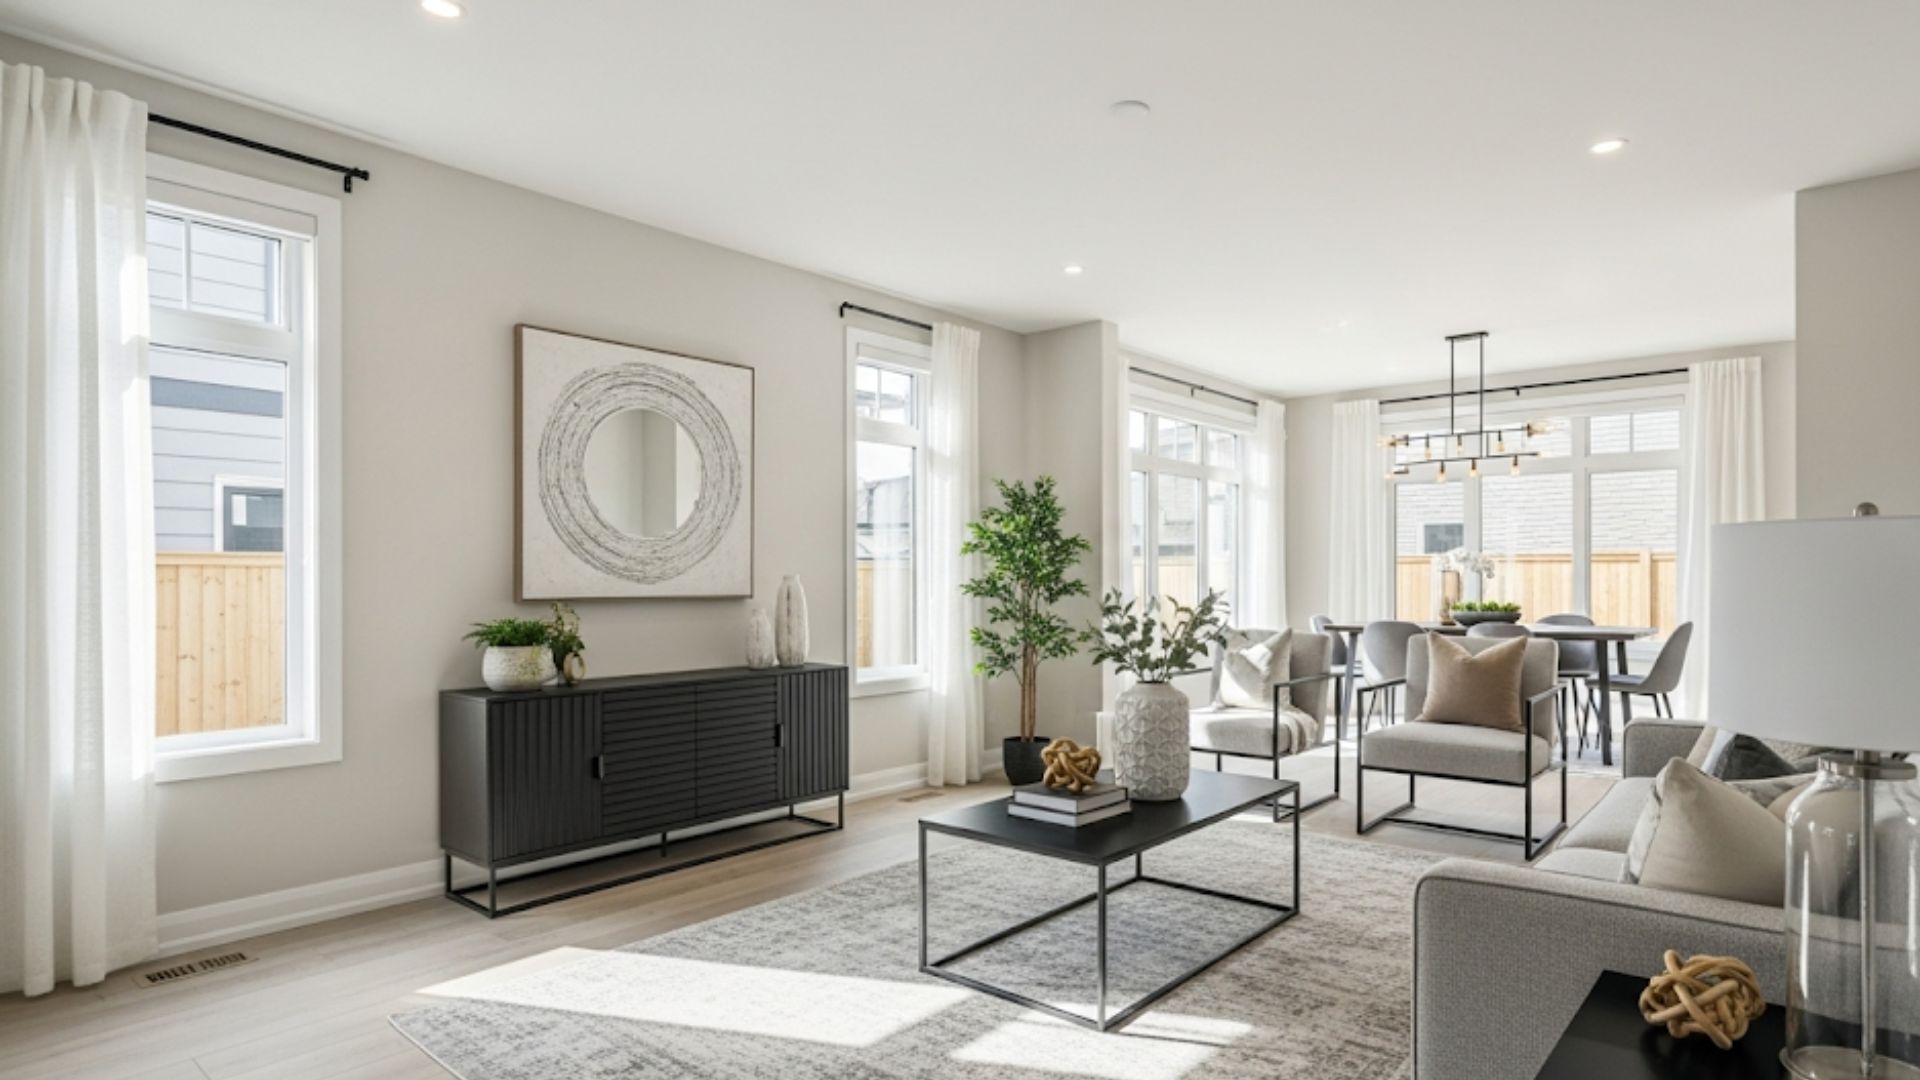
📸 A real estate photoshoot that highlights your home’s best features creates emotional appeal and helps it sell faster and at a better price.
Why Real Estate Photo Prep Is Essential
Even the best camera can’t save a cluttered or dimly lit home. A prepared home makes it easier for buyers to visualize themselves in the space and increases your chances of a strong offer. Prepping your space for a real estate photoshoot ensures every room looks its best.
Declutter First Before the Real Estate Photoshoot
Cluttered rooms look smaller and less inviting. Remove these before your real estate photoshoot:
- Personal photos, calendars, and fridge magnets
- Pet toys, food bowls, and beds
- Excess furniture and small appliances
✔️ Think model home: clean, spacious, and neutral — the ideal setup for your next real estate photoshoot.
Deep Clean for a Successful Real Estate Photoshoot
- Vacuum and mop floors
- Wipe down all surfaces and appliances
- Clean windows, mirrors, and light fixtures
🧼 Consider hiring a professional cleaning crew to make your real estate photoshoot shine.
Maximize Lighting for Better Real Estate Photos
- Open all curtains and blinds
- Turn on every light in the home
- Replace any burned-out bulbs with soft white or daylight options
Bright and even lighting plays a major role in real estate photography. Your real estate photoshoot benefits from warm, natural light in every space.
Staging Tips to Improve Your Real Estate Photoshoot
- Use neutral throw pillows and linens
- Add fresh flowers or houseplants
- Keep countertops and tables clear
- Arrange furniture to emphasize room flow
🎯 Good staging sets the tone for a standout real estate photoshoot.
Curb Appeal Matters in Real Estate Photography
- Mow the lawn and trim bushes
- Sweep porches and walkways
- Remove vehicles and hide trash bins
- Stage patios or balconies with clean seating
The exterior is often the first photo buyers see in your real estate photoshoot. Make it count.
Room-by-Room Checklist for Your Real Estate Photoshoot
🛋️ Living Room
- Fluff pillows and tidy throws
- Hide remotes, wires, and personal items
🍽️ Kitchen
- Clear all counters completely
- Hide trash bins and drying racks
- Polish appliances
🛏️ Bedrooms
- Make beds with clean, wrinkle-free linens
- Clear nightstands and dressers
🛁 Bathrooms
- Remove all toiletries
- Hang fresh matching towels
- Keep toilet lids closed
💼 Home Office
- Clear paperwork and wires
- Stage a clean, functional workspace for your real estate photoshoot
Avoid These Mistakes Before Your Real Estate Photoshoot
- Leaving personal items visible
- Fans running during the shoot
- Unmade beds or clutter in corners
- Too many decorative props
Final Photoshoot Day Checklist
- Lights on in every room
- Toilet seats down
- Pet items removed
- Cars moved off property
Make Your Listing Shine with a Professional Real Estate Photoshoot
✨ Clean. Stage. Shoot. Sell faster with real estate photos that convert.
HomeviewPhotos helps you stand out online with expert real estate photoshoot services including interiors, exteriors, twilight, drone, and Matterport 3D tours.
📞 Ready to Book Your Real Estate Photoshoot?
Schedule your real estate photoshoot today at homeviewphotos.com or contact our team for a custom quote.